Y’all know I LOVE my foils and continue to find different applications and surfaces to foil. I thought a custom foiled jean jacket would be a fabulous idea.
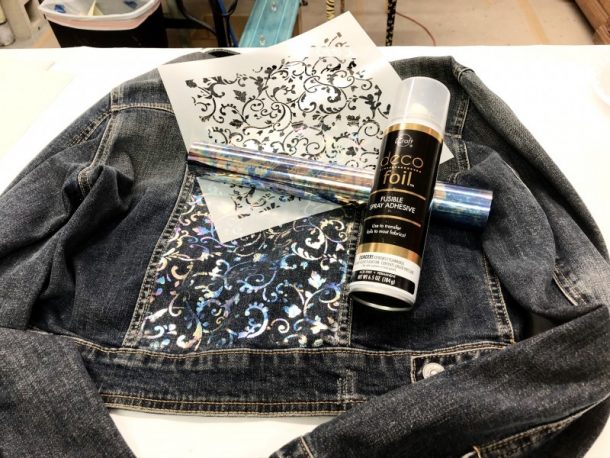
I decided to dress up one of the jean jackets I had in my closest and add a little bling. So I grabbed my favorite stencil and my Deco Foil Fabric Spray Adhesive and the fun began.

DIY: Custom Foiled Jean Jacket
Foiling on fabric is a lot of fun but the application is different than working on a hard surface. First, you need to make sure that you are using a Textile Foil (we specify which of our foils are on our website) and you will need a Textile Foil Adhesive, we have three different ones to work with.
For this custom jean jacket project...
I used the Abigail Foil and the Fabric Spray Adhesive. I positioned my stencil on the back of the jacket and made sure to tape everything off so that the over-spray didn’t get on the jacket. Make sure to shake the can really well (for at least 30 seconds or better) and then spray over the openings of the stencil pattern.
You want to hold the can about 6” to 8” away from the surface and spray an even coat. Make sure that you cover every opening and don't spray too thick. I advise practicing on some scrap fabric first to get the hang of it.
Once you spray the stencil, you can remove the stencil and reposition it if necessary. With the Nora Paige stencil I used, I had to do a few repeats to cover the area I wanted to stencil. Then I allowed the Fabric Spray Adhesive to dry for about 10 minutes.
During this 10 minutes, there a couple of things you'll want to do.
First, make sure to plug in your iron, or you can use a Heat Press if you have one, and turn it on to about medium to medium-high (don’t go too high you can melt the foil). You ask how I know this... Well, I did melt the foil once on a new iron that got really hot! LOL!
Second, I advise cleaning the spray adhesive off of your stencil before it gets stuck on there. The easiest way I have found is Goo be Gone, you can find this on Amazon. (affiliate link below)
Ironing your foil...
You can iron directly over the foil or if you want, you can use a piece of parchment paper over the foil and then iron over that. Iron for about a minute or so, moving the iron around to make sure you have ironed over the complete stencil design. You can check by lightly tugging at the foil to see if it is stuck to the adhesive, but don’t pull it off at this point.
Most foils are a cold release, so allow the foil to completely cool before removing it. Allow the foil to cool down by itself, do not go put in in the fridge or freezer. One of my customers tried this and she didn't get good results, unfortunately.

Once the foil has cooled down completely, gently remove the foil and it should be transferred to the surface everywhere there was foil adhesive. If you find that an area didn’t transfer well, cover it back with foil and iron again, make sure you allow to cool down every time you iron.
Once your design has been covered in foil with the heat transferring, there is nothing else you need to do! You can wash your finished product in the washer. Just make sure it's inside out and cold water on a delicate cycle. Absolutely NO dryer, hang to dry, or Dry Cleaning is also an option.

Well, that’s about it... Such a super fun and easy way to update my jacket! :)
More of a visual learner?? Check out the video below :)