But let’s get started on the process that I used...
I found these large pumpkins left over from last year (guess I bought a few extras) and decided I wanted to use one of my fauxy rollers! Then I troweled on our Texture Medium with the mini trowel applying a layer that is about 1/16” to 1/8” thick. You don’t need too much to get a great print from the rollers. Then I used a chip brush to create the texture on the stem, creating a little wood grain look. While the Texture medium was wet, I rolled through it with our Chrysanthemum Fauxy Roller design. You will need to allow the Texture Medium to dry for several hours which will depend on how thick you applied it. I usually allow it to dry overnight and once it’s dry, I sand off the high rough areas. Then I used a couple of acrylic paint colors together to create a little blending in the base color. I used three different teal Americana Acrylic colors. You can add a little water to help with the blending process when brushing on several colors at the same time. Then I allowed my paint to dry completely. Once the paint was dry, I wet sanded over the design to highlight the pattern. I sprayed the water onto the sandpaper to keep the sanding to as little mess as possible and only sanded over the design to highlight the edges of the pattern.
This is where I got carried away!!
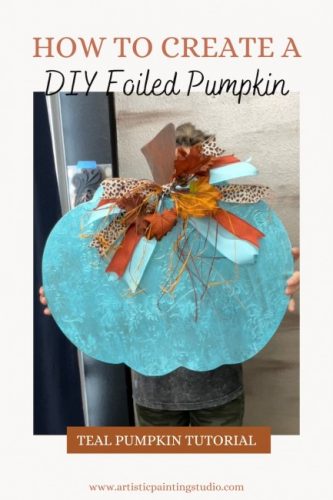
Y’all know I love animal print and I always say it’s my favorite color! LOL! So I decided to add some patches of animal print foil and it was just too much with the roller design… A total overkill! But the process I used was randomly applying the foil adhesive here and there… allowing it to dry and then foiling those random areas. It just got too busy for my personal taste and I painted back over the entire pumpkin! A girl has to do what she feels is best and sometimes that is to start over. Once I painted my pumpkin again with the same acrylic colors, this time there were more layers of paint and the wet distress sanding technique wasn’t working to highlight the design like it did with the first layer. So, I grabbed one of our Filbert Brushes and dry brushed on some darker color to highlight the design. Then once the paint was dry, I applied a layer of Foil Adhesive to the entire pumpkin. Once this dried for about an hour, I used our Aquamarine foil and foiled the entire pumpkin. This second attempt was more of what I was looking for and turned out stunning. Make sure to topcoat to protect the surface. If you are planning to hang outside, grab our Modern Masters MasterClear Supreme, it’s exterior-rated and will protect your foils from the sun.
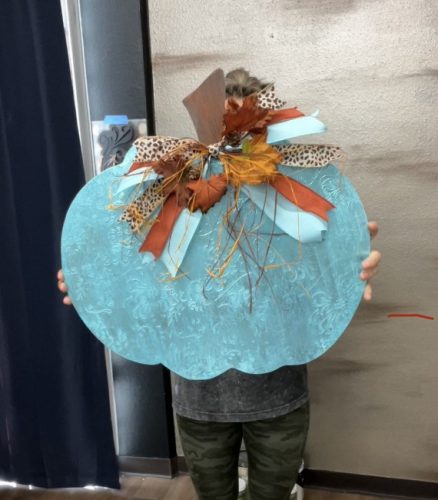
I added a fun “messy” bow to finish off the look, adding some of my favorite animal print to the ribbon. Now my DIY Teal Foiled Pumpkin is ready to hang anywhere in my house! Hang on any door or wall for some fun festive fall decor!
Supply List:
- Texture Medium
- Chrysanthemum Fauxy Roller
- Acrylic Paint
- Foil Adhesive
- Aquamarine Foil
- Ribbon