I found these adorable DIY Glowforge Easter Bunnies and had to have a couple of sets to create for this Easter and Spring season! I am so excited to share this super fun and easy project with you today.

DIY Glowforge Easter Bunnies
If you have your own Glowforge laser you can cut yourself some bunnies or eggs, or any other Spring or Easter-themed shape and create your own fun DIY project!
Let's get started on this fun project!
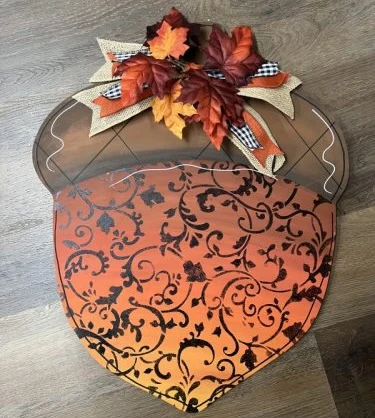
First, you will want to basecoat all the pieces (bunnies and flower overlays) with our Bondago Black paint. Just brush on one good layer keeping your brush strokes smooth and even, then let everything dry.
Next, you will apply a layer of our ArtsSyVille Embellishments Foil Adhesive to all parts. You will use a brush to apply the Foil Adhesive onto the bunnies, and use a sponge brush to pounce the Foil Adhesive onto the flower overlays. Making sure that the foil adhesive stays on the top layer of the overlay. Allow the foil adhesive to dry for at least an hour.
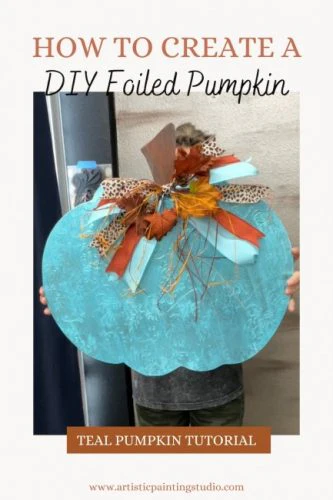
Then I grabbed some of my favorite foil colors and patterns. I actually changed my mind from my original colors, but that tends to happen around here with so many choices. I ended up going with Abigail Flowers, Aquamarine, and Light Rose for my bunnies. Each bunny was foiled in one of the colors, and then I used the Abigail over the Aquamarine and Light Rose on the flower overlay and the Aquamarine on the flower overlay for the Abigail bunny.
You will grab some of your favorite foil colors and patterns to get started foiling your bunnies. To apply the foils onto the dry Foil adhesive, just lay them over the surface with the Color or Pattern side facing you and rub/scrub the surface to transfer the metallic foils to the surface.

Viola! You have your own custom DIY Glowforge Easter bunnies 😁
You can purchase the Bunnies for $20.00 plus s/h, HERE!