Are you ready to get crafty and create some one-of-a-kind decor for your home?? If you answered yes, you are going to love this Dollar Tree Arrow DIY.

If you haven't been recently, the Dollar Tree has an amazing collection of surfaces you can create on. The best part?? The surfaces are only a buck! You just can’t beat the deals they have and they have so many different ones to choose from.
I started to get in a habit of hitting up the local Dollar Tree once a week to see what’s new. Yes... I have a pile of projects ready for me, but a girl can never have too many projects waiting for her!
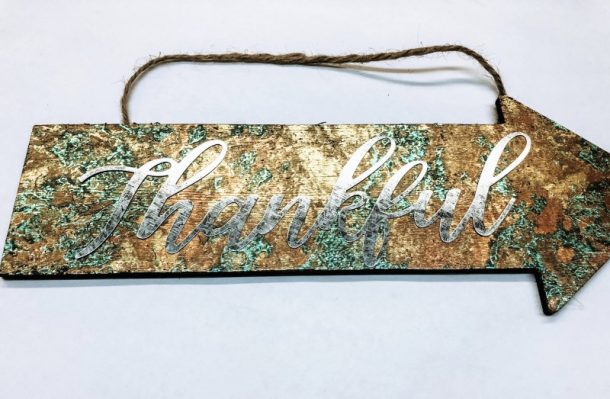
On one of my last trips, I found these wood arrows and a collection of metal words, Harvest, Thankful, and Welcome that fit perfectly on the arrows! This seemed like it could be a fun project, so I grabbed several of each.

Let's get started...
I lightly sanded the arrows to make sure they were cleaned up nice and then base coated them in Black Bondago. Y’all should be getting used to this being my go-to paint at this point 😁
Next, I went looking through my foil collection to see what foils I thought would be fun to bring together! I chose Weathered Copper, Melody, and Wild Leopard Spots Gold Small. I know it doesn’t seem like they would work together but you will be amazed at how well they really do look together.
Once your paint has had a chance to dry...
Make sure it's been several hours. Then you can apply a layer of Foil Adhesive. When brushing on the foil adhesive I like to add a little water, about 1 to 2% to thin it down so that it will brush on a little smoother. Don’t water it down too much you could lose your adhesion. Foil Adhesive does not self-level so try to apply as smoothly as possible. Allow the foil adhesive to dry for at least an hour so that it dries to a firm tack.

Once the foil adhesive is "dry" you will lay the foil over the surface with the pretty/patterned/colored side facing up (facing you) and rub or scrub the surface to transfer the foil to the project. Lift a corner and look under to see if you are getting the transfer you want (we don’t always want 100% transfer). When you are happy with the transfer, peel back the carrier and reveal your beautiful foiled arrow.

Protecting your project...
I made sure to apply our Final Coat over the foil to protect the surface and then glued on the metal words to each arrow. The arrows came with the twine to hang, you could leave this or change it out to match your project. This Dollar Tree Arrow DIY was such a fun project.
