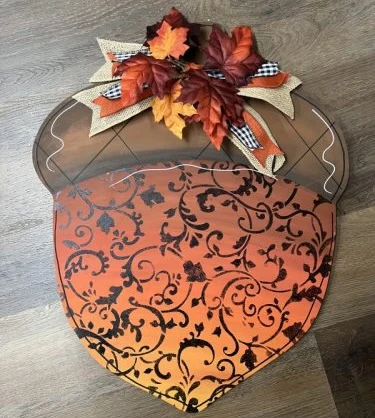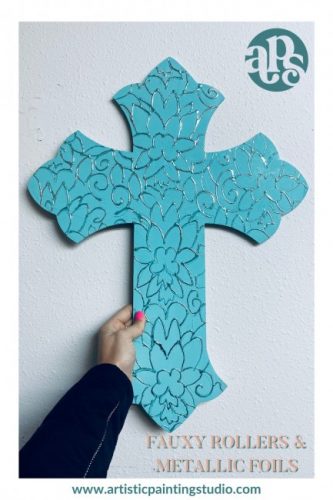
Lotus Flower & Metallic Foiled Cross
Next, you will grab some of our fabulous Texture Medium and our Mini Trowel which we absolutely LOVE for small surfaces and tight areas. Apply a thin layer of the texture medium onto the surface, you only need it to be around 1/8th to 1/16th of an inch thick. It really doesn’t take much to create an imprint from the rollers.
Once you have the surface completely covered, I usually take my finger and wipe off any excess that has gotten onto the edges (easier to clean up now when wet than having to sand later). While the texture medium is wet, you will roll the Lotus Fauxy Roller through the wet material. Just start at one end and roll straight through to the other end. I went down the middle of the cross and then rolled each side. As you can see, I didn’t bother to try and line up the pattern and it looks fabulous. So don’t worry about that!
You will now need to allow the texture medium to dry. This will take a few hours depending on how thick you applied the material. I usually wait about four hours or leave it overnight to dry. Once it’s dry you will need to sand down any rough areas that peaked from the roller, but just a light sanding is all that should be needed. We don’t want to sand too much and lose our pattern. Dust off the surface and we are ready for our next layer. Next, I painted the entire cross with the DIY Chalk Paint by Debbi’s Design Diary in the shade Old 57! One of my favorite colors! Make sure you have complete coverage. One or two coats should give you complete coverage, and then you will allow your project to dry.
For the next step, I grabbed our DecoFoil Liquid Adhesive which has a tip that you cut off. Depending on how much you cut off the tip, will determine the thickness of the line it will create. I usually cut off just a little to keep my line thin, but that is a personal preference. For this project, you can have a little thicker line if you want. You might want to practice on a piece of paper first to get the hang of how much comes out and draw your lines before starting on the project. All I did was trace the pattern created by the Lotus Roller. Trace as much of the design as you would like. I traced the entire pattern and then allowed the adhesive to dry. This adhesive will take about an hour or so to dry, it will go from milky white to completely clear and remain tacky for a long time.
Once the adhesive was dry, I used our Bright Silver Metallic Foil and laid it over the adhesive. I scrubbed with a nail brush or toothbrush to transfer the foil to the surface. When you are done with everything make sure to apply a layer of Topcoat to protect all your beautiful work! Add some ribbon, a bow, or embellish as you would like to create a fabulous door-hanger!!