Talk about taking FOVEVER to complete a project... I really think this one has been going on for over a year. It keeps moving around my studio (uncompleted) from the office to the workroom and back to the office. I even started putting stuff on top of it! LOL! You know you’re in trouble when you start using a project and it’s not even finished yet!! It may never get finished at that point, it just becomes a piece of furniture in your office. LOL!
Well, part of the problem was I didn’t like what I did to the top of the cabinet. Sometimes you do something and it just doesn’t come out as well as you had envisioned. Oh well... it just means another coat of something to change it!
I did decide on the White/Gold theme for this piece just because it was popular at the time, not because it was my favorite look. This is also part of the reason it’s not completed... I just wasn’t feeling it! But as time has gone on, I have changed several parts making it finally come together in my eyes and I’m the only one that has to love it for it to be finished!

But I would love to share my process on this adventure of the "Little White Cabinet" that I named Paige!
I started with the White Swan DIY Paint by Debi’s Design Diary (Love this paint!) and base coated the entire piece with two coats.
Then I decided to do a White on White crackle finish. I’ve always thought this was so elegant and such a subtle finish that’s barely there but adds so much character to a piece. This technique was randomly placed here and there so that it would be more subtle and blend with the other elements I planned to use.
Then it was time to start "blinging" this piece up with Gold accents! I choose the DeVille Scroll stencil to emboss the sides with a mixture of Glass Bead Gel and Gold Glitter. Yup this is a blingy mix! Just mix the Glitter color of your choice into the Glass Bead Gel, usually add about 3 tablespoons of glitter to 1 cup of Glass Bead Gel (I used 14K Gold Glitter for the color).

Make sure to spray the back of the stencil with a repositionable spray adhesive, we use the Stick it Spray Adhesive around here. We spray this outdoors and then allow the adhesive to tack up for at least a minute or so. This way it will not leave a sticky residue on your surface. Once it has tacked up, position the stencil at the desired location and also use some of that wonderful “blue” tape to secure the stencil.
Then grab a Color Shaper Tool to apply the Glass Bead mixture (this is the greatest tool ever for applying glass beads... it is a must-have!) Just scoop out some of the mixture and using the Color Shaper Tool, trowel it over the stencil openings. Use light pressure and make sure to lay the beads down in one layer. Try to not allow them to be thicker than the one bead thickness, otherwise, you can have “hazing” in the glass beads. Here is another video to watch the process.

I embossed the Deville Scroll pattern twice on both sides of “Paige”. Make sure to allow the first embossed design to dry before creating the second one.
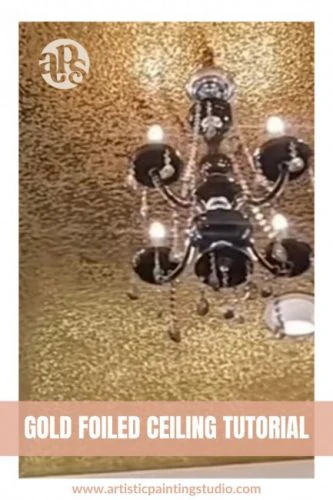
Now it was time to enhance the architectural design of Paige with some foils that would match the Glass Bead/Glitter stencils. I grabbed some of my fabulous Foil Adhesive and brushed it onto the areas that I wanted to foil including the doorknob and handle. Once the Foil Adhesive dried to a firm tack (which is about 30 minutes to be safe) I just rubbed on the Warm Gold Foil using a scrubber brush. If foils are new to you, check out this video.
Then I had this great ideal for the top of the cabinet (at least I thought it was a great idea) and I used the Diamonds Fauxy Roller to roll only through the middle of the top and still did some of the crackle on either side. To be honest, it was only okay which is not how I want to feel about my pieces of artwork. From here it even went more downhill and I decide to enhance this feature (what was I thinking) I hand brushed foil adhesive into the recessed lines of the Diamond pattern and put 14K glitter over the diamond lines (again, not sure what I was thinking) and I hated it and it sat like this for many months. Trying to embrace it and fall in love with it... but I just couldn’t.
After Paige had moved around my workroom for many months and then for some reason it ended up in the office (probably trying to keep it safe during a workshop), I finally decided that the top just needed to be redone! So, I sanded it off as much as I could and then applied a layer of Texture Medium to bury it! Gotta love that Texture Medium, it works for so many things!

Ready for another layer and a better technique, I grabbed my Texture Medium and the Lotus Fauxy Roller for another attempt at making this piece gorgeous! I troweled on a layer of Texture Medium and rolled the Lotus pattern through the wet material, you can watch this process here.
Once the Texture Medium was dry, I sanded off the high areas to make it smooth to the touch and just painted it White Swan. Keeping it subtle to enhance the rest of everything that had been applied to this piece. Once I did the top, I decided that I also needed to do the door this pattern as well.

Finally, after many months (maybe a year or so) Paige is completed! She’s been on a long journey to get where she's ended up, but sometimes it just takes that long to complete the vision!
I’m sure that you all have experienced a similar story... As we try to create a masterpiece with every project it doesn't always go as planned at first, but it always works out in the end :) Please feel free to share your story in the comments below!!


