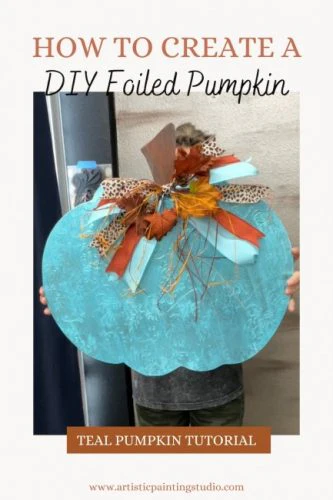
It’s finally that time of year to start decorating for fall. Can you tell that I’m excited about this? 😁 I am so excited to share this DIY Pumpkin Tutorial with you!!
One of my all-time favorite projects is to Foil pumpkins! And I mean ALL of my pumpkins... paper-mache, plastic, Dollar Tree and Hobby Lobby finds, and yes, even real pumpkins!!

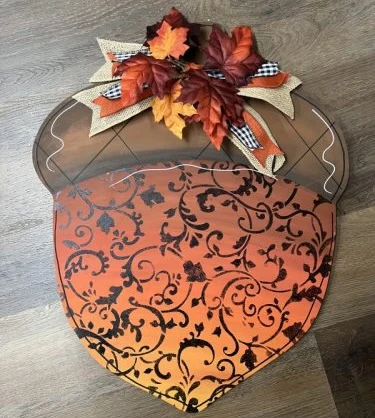
DIY Pumpkin Tutorial
You can even create your own theme for the holidays! Can you imagine an entire house decorated with animal print pumpkins?? I think this would be amazing 😍
Whatever color or theme you desire, you can create it with a little Foil Adhesive and Foil.
I have recently been on an animal print pumpkin kick this year...
You might have seen some of these tutorials on my Facebook Lives, YouTube Channel, or even my last Hometalk segment this past month.
Check out my YouTube Tutorial!
Foiled pumpkins are such a fun and easy project to create! Take a little trip to your local Hobby Lobby, Michaels, or the good ole Dollar Tree and snatch up some pumpkins no matter what color they are. You can always change the color of them!
I recommend painting the surface of the pumpkin you choose in the color black. My go-to paint and primer is Bondago. But... depending on the color of the pumpkins and the color you plan to foil, you can possibly leave them as they are. You will have to determine this based on your project. If your pumpkins are slick plastic you will need to do a little extra prep. You will need to lightly sand and prime the surface before you get foiling.

Let's get started...
First, you will paint your pumpkin. I usually go with black because most foils look great over a black basecoat. Allow your paint to dry for several hours and then apply your Foil Adhesive. Make sure to allow your foil adhesive to dry for at least an hour. If you live in a humid area, you will want to allow your foil adhesive to dry longer. You want the foil adhesive to dry to a firm tack.
To make cleanup easier, I covered the surface I was using with press-n-seal so that the pumpkin would not stick to anything. Also, I used painter triangles to put the pumpkin on while drying.

Next, grab some of your favorite foils and cut them into strips to make it easier to foil an odd-shaped surface. Also cut a piece large enough to set the pumpkin on while foiling the sides and top. This way it’s just sticking to the foil you are using.
Ready to give your pumpkin more bling??
Everything can use a little Glitter! The foil adhesive will still be sticky any place that the foil didn’t transfer 100% and your glitter will adhere to the surface in these spots. I sprinkled some glitter on my pumpkin, and then also found a bag large enough that my pumpkin would fit in. I put the pumpkin and glitter in the bag and shook it until it was covered in glitter 😍
 Once you are done foiling your pumpkin, make sure you protect your beautiful pumpkin with a topcoat. We want you to enjoy your pumpkins for as long as possible! My go-to topcoat is Final Coat.
Make sure to check out all of my videos on Facebook, YouTube, and Hometalk for some great ideas!